
If you’ve been in the game long enough, you know that the standard push-up: while a classic: eventually hits a ceiling. You can bang out fifty reps, but are you actually getting stronger, or are you just getting better at repeating a movement your body has already mastered? For athletes like Victor Wembanyama or the rising stars of the 2026 World Cup circuit, "good enough" doesn't cut it. They need functional, asymmetrical strength that translates to the field, the court, or the mat.
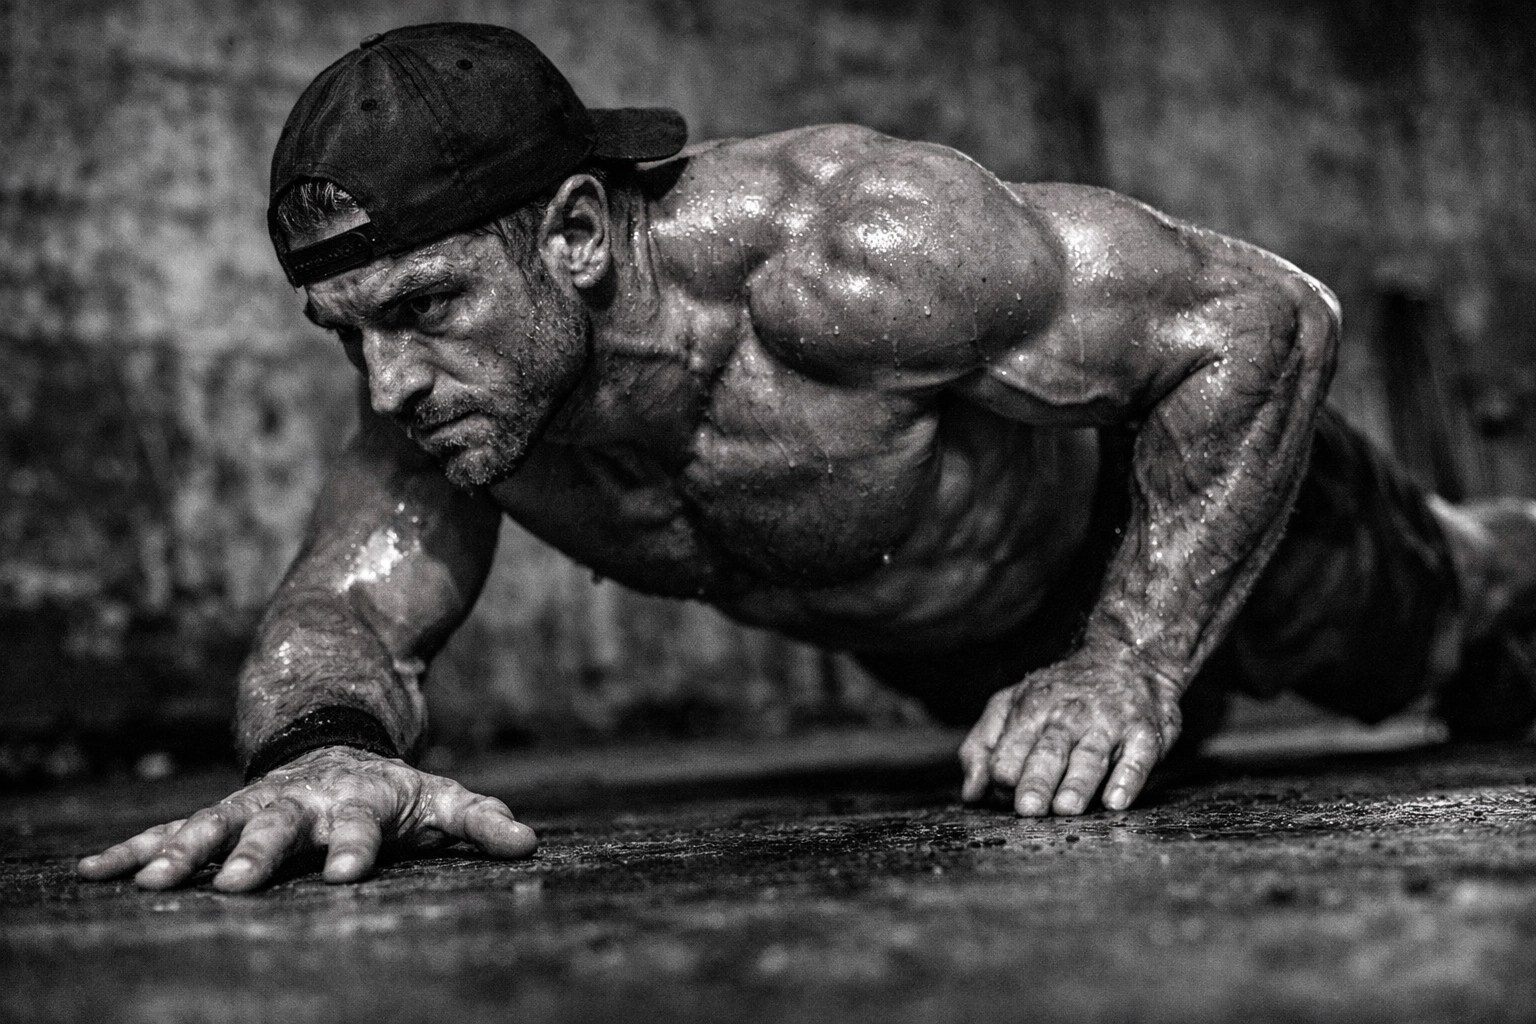
Enter the Staggered Hand Push-Up.
This isn't just a "harder" version of a push-up; it’s a diagnostic tool and a muscle-builder rolled into one. It’s designed to expose the weaknesses you’ve been hiding behind your dominant side and force your core to stop being a passenger. At Best Sports Recovery, we’re all about the science of movement and the reality of the grind. Let’s break down why this variation belongs in your protocol.
The Anatomy of the Stagger: Why Asymmetry Wins
In a standard push-up, your hands are symmetrical. Your brain distributes the load 50/50 (ideally). But life and sports aren't symmetrical. When a linebacker shoves you or you’re bracing for a fall in a skatepark, your hands aren't perfectly aligned.
The staggered hand position: where one hand is placed roughly 6–12 inches forward and the other 6–12 inches back: creates an uneven loading pattern.
- The Forward Arm: This position emphasizes the pectoralis major (the chest). Because the hand is further from the center of gravity, the chest must work harder to stabilize and push.
- The Rear Arm: This position shifts the load heavily onto the triceps and the posterior deltoid.
By alternating sides, you ensure that both the "pushing" power of the chest and the "lockout" power of the triceps are developed equally on both sides of the body. It’s the ultimate fix for that "one side is stronger" feeling that haunts many lifters.
How to Execute with Precision
Don't just throw your hands down and hope for the best. To get the stability benefits, you need a locked-in technique.
1. The Setup
Start in a high plank position. Move your right hand forward about six inches and your left hand back about six inches. Your fingers should be spread wide to create a stable base. Keep your feet hip-width apart: the wider the feet, the more stable you'll feel, so narrow them if you want an extra core challenge.
2. The Descent
Lower your chest toward the floor. Here’s the trick: keep your elbows at a 45-degree angle relative to your torso. Tucking them too close kills the chest engagement; flaring them out too wide trashes your shoulders.
3. The Core Brace
This is where most people fail. Because your hands are staggered, your hips will want to rotate. Your job is to fight that rotation. Imagine a glass of water sitting on your lower back: don't let it spill. This "anti-rotational" work is what builds world-class stability.
4. The Switch
Complete your reps on one side, then swap hand positions. For a more dynamic challenge, you can "walk" your hands into the next position between every rep.
Beyond the Pump: The Stability Factor
We often talk about "core stability" as if it’s just about doing planks. Real stability is the ability to maintain posture under an uneven load. When you’re performing staggered push-ups, your internal and external obliques are screaming. They have to counteract the natural tilt of the torso.
For high-impact athletes: think skateboarders performing aerials or soccer players mid-tussle: this specific type of stability is what prevents injuries. When your core can handle an asymmetrical load, your spine stays protected.

The Reality of the Journey: Sweat, Setbacks, and Progress
Let’s be real: the first time you try these, you’re going to feel weak. You might find that when your left hand is forward, you can do ten reps, but when the right hand is forward, you struggle at five. That is the point.
Progress in sports isn't a straight line. It’s a messy process of identifying a weakness, attacking it, failing, and trying again. Athletes like Shohei Ohtani don't reach peak performance by doing the easy stuff; they reach it by leaning into the movements that make them feel uncoordinated until those movements become second nature.
If you feel a "tweak" or a sharp pain, don't just push through it. That’s your body telling you that your recovery hasn't kept up with your training.
Recovery: Moving Past the RICE Myth
For decades, the standard advice for muscle soreness or minor strain was RICE (Rest, Ice, Compression, Elevation). But the science has moved on. We now know that "Rest" can lead to stagnation and "Ice" actually constricts blood flow, slowing down the delivery of the nutrients your muscles need to repair.
Instead, we advocate for Active Recovery and natural inflammation management.
The Menthol Placebo vs. Real Healing
You’ve seen the commercials for menthol-based rubs that "freeze" the pain. Here’s the truth: products like Icy Hot don’t heal anything. Menthol creates a chemical sensation on the skin that distracts your brain from the pain: it’s a placebo. It masks the symptoms while the underlying inflammation continues to simmer.
If you want real recovery, you need to address the inflammation at a cellular level. This is where Clayer comes in. Unlike synthetic chemicals, Clayer uses a specific composition of over 60 minerals found in French green clay to physically draw out toxins and reduce inflammation. It’s about healing the tissue, not just numbing the skin.
Recovery Comparison Table
| Feature | Menthol-Based Rubs | Clayer (Natural Clay) |
|---|---|---|
| Primary Function | Masks pain via cooling sensation | Absorbs toxins & reduces inflammation |
| Ingredients | Synthetic chemicals & Menthol | 100% Natural Minerals |
| Healing Properties | None (Placebo effect) | Accelerates tissue repair |
| Skin Safety | Can cause chemical burns/irritation | Safe, pH balanced, and non-toxic |
| Athlete Trusted | Low-level/Commercial | Used by World Champions & Pros |
| Verdict | Temporary Distraction | #1 Winner for Real Recovery |
The Holy Trinity: Nutrition, Sleep, and Exercise
You can do all the staggered push-ups in the world, but if your foundation is shaky, your results will be too.
- Nutrition: Your muscles are built in the kitchen. After a heavy session of asymmetrical work, your body needs amino acids to repair those micro-tears and complex carbs to replenish glycogen. Stick to whole foods. If it comes in a crinkly plastic wrapper, it’s probably not helping your recovery.
- Sleep: This is your primary recovery window. During deep sleep, your body releases growth hormone. If you’re cutting your 8 hours down to 5, you’re effectively throwing away 40% of your gains.
- Exercise Consistency: Recovery doesn't mean sitting on the couch. On your off days, go for a light walk or do some mobility work. Keeping the blood moving is the fastest way to flush out metabolic waste.

Integrating Staggered Push-Ups Into Your Routine
Ready to try it? Don't replace your entire workout. Start by subbing out your regular push-ups once a week.
- Beginner: 3 sets of 8 (4 per side), focusing entirely on keeping the hips level.
- Intermediate: 4 sets of 12 (6 per side), moving the hands more aggressively (10-12 inches apart).
- Advanced: "Walking" staggered push-ups. Switch hand positions between every single rep for 3 sets of 20 total.
As you get stronger, you'll notice a difference not just in the mirror, but in how you move. Your "weak" side will catch up, your bench press will likely stabilize, and your core will feel like iron.

Final Thoughts
Performance is about balance: balance between the left and right side of your chest, and balance between the intensity of your training and the quality of your recovery. Don't settle for masking pain with menthol placebos. Use tools like the staggered hand push-up to find your weaknesses, and use natural, mineral-rich solutions like Clayer to fix them.
At Best Sports Recovery, we believe in the grit, the sweat, and the science. Get back out there, stagger those hands, and challenge what you thought you were capable of.
Leave a Reply